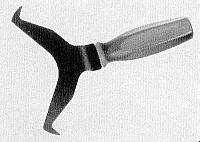
It took me about two weeks of thinking and asking dumb questions before I got the advice I needed to remove the front and back glass. Then it took about 4 hours to do the work. If your serious about working on your Mustang, get a shop manual and a how to restore mustang book. Neither are adequate alone. The first step in windshield removal is to remove the exterior trim around the glass. This requires a windshield trim removal tool. I found the right one at NAPA for about $10, however I actually used an incorrect tool which costs $3.60 from another parts store. This tool has handle with a flat piece of metal coming out in a Y shape. The bottom of the Y is in the handle and each of the top legs has a hook on the end. (You can fabricate a tool by cutting a notch in the end of a putty knife, this may actually be better as the blade is thinner.)

Windshield trim removal tool available at most parts stores or
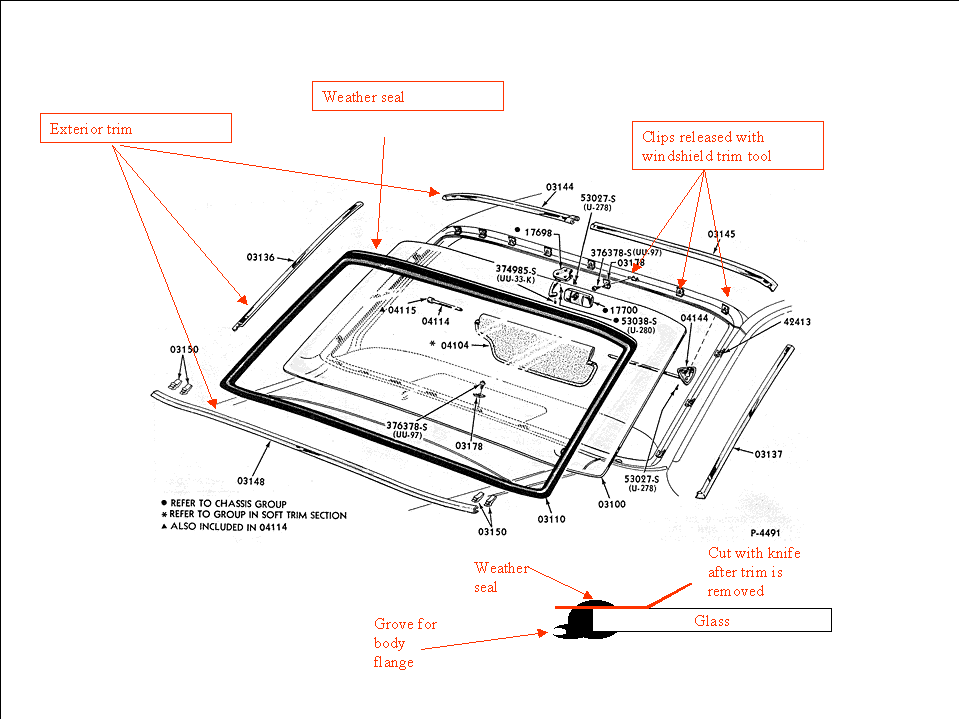
http://www.sktoolstore.com/kd/kdbody01.html#2037The first piece of trim to work on is the top on the passenger side. You insert this tool between the trim and weather seal to release the clips that hold on the trim. You slide the tool along until you feel the clip. See the attached drawing. Sliding the tool really means struggle with moving as there is sealer between the weather seal and the trim. It will take a while to get the feel on the first clip but after doing one the others will go rapidly. Once all the clips are released the trim will lift off. Repeat the process for all trim pieces.
With the trim off cut the weather seal using a very sharp knife or razor. The glass should be loose, if not, pass a knife blade between the glass and the weather seal. You should now be able to lift out the glass. One person pushes from the inside at the top of the glass. Another person on the outside controls the movement of the glass.
Use the same process for the rear glass except the side trim pieces are attached with screws on the outside rather than clips.
Notes on installation from Charles Turner on Vintage Mustang Discussion Group
Ford DID use sealant, I don't know where you heard they didn't, but they are wrong! Installation is better with 2 people. Here are the installation steps:
supplies:
-3M Windshield glazing putty, 2 tubes
-caulking gun
-1/8"-1/4" thick rope(about 10-15 feet of it)
-solvent for cleanup
procedure:
End of write up.
